Monday, 24 December 2012

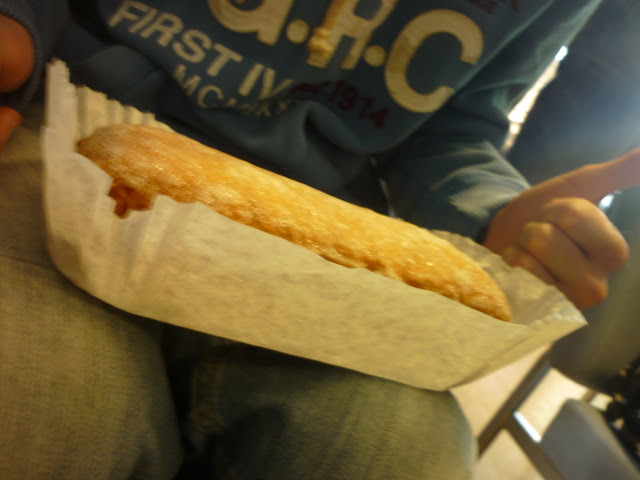
Garibaldi Biscuits : My Granfy's favourite. :)


Merry Christmas Everyone! I can't believe it's Christmas eve already! It always comes around so quickly and here in the Shiner household the festivities have certainly begun!!!
I hope this all finds you all well and jolly my little Christmas Puddings and although the weather here is possibly the most un-Christmassy I've ever seen it, that wont stop me bopping around the kitchen to Ella Fitzgerald with a shortbread biscuit in hand. :)
In fact, Christmas has been pretty relaxed this year, so relaxed that I wrapped my last present THIS MORNING! I know, crazy.
However, there is a reason as to why I've left it so late. You see, whenever I bake it's almost always for my friends and it's heartbreaking watching the forlorn faces of my parents and brother as tins of treats get carted through the front door and out of sight. They never get a look in.
Bless.
So this year I've decided to bake a whole lot more! And this specific recipe goes out to my Granfy. He is the sweetest, loveliest, kindest, gentlest man I know and the best Grandfather ever! However at Christmas, he's awfully hard to buy for... but then I suppose, most men are. ;)
So this year I decided to make his favourite things. Garibaldi biscuits and I used a recipe from BBC Food. He eats them by the packet and can't get enough! So this year I made a large batch, scooped them up and popped them in a box, complete with ribbon and a bow. :)
These biscuits are so yummy! And smell gorgeous too. :D
Merry Christmas Granfy! These are for you. x


Ingredients
110g caster sugar
110g butter, softened
1 free-range egg, separated
225g flour, sifted
pinch of mixed spice
55g currants
30g candied peel
3tbsp milk

Method
Preheat the oven to 160 degrees/Gas mark 3.
Line 2-3 baking trays with greaseproof paper.
Cream the butter and sugar together in a bowl until light and fluffy.
Beat in the egg yolk.
Fold the flour into the mixture.
Stir in the mixed spice, currants and candied peel.
Stir in enough milk to form a stiff dough.
Roll out the dough on a floured surface and cut the biscuits into your desired shape.
Place on a baking tray and bake for 10mins until golden brown.


Pin It Now!

Sunday, 23 December 2012

The Perfect Gift : Sugary Christmas Biscuits and Snowflake Decoration!

Mum was being sneaky with the camera..
Moi, in my element.

And so, little sugar lumps, for my second act tonight I bring to you a gift idea! My first, actually. And I'm so proud of these little beauties. :D
As a close group of people, my friends and I absolutely love Christmas! We buy gifts, bake cake and generally have a really good time! Anything to make school less of a drag. :)
But as we've got older, buying a gift for every single person in the group became difficult and money became pretty tight for a lot of us... *sigh*.
So this year, we decided to bite the bullet and try secret Santa. Buying only one gift?! It seemed ridiculous!
But actually, it worked so well! And my secret Santa (who actually turned out to be my good friend Sophie) got me the most beautiful bracelets, nail varnish and chocolate! She knows me so well. :)
In fact, this Secret Santa was such a success that I found the time to bake for everyone instead!
Using a really great biscuit recipe from The Primrose Bakery book, my new snowflake icing plunger from The Happy Cupcake Company, some Thorntons chocolates, lots of cellophane and metres of gold ribbon I managed to make gifts for everyone! Reeeeeeeeeesult!
Not being the most creative person ever, I was sooooooooo unbelievably proud of these and I hope it's not too late to inspire some of you lot either! :D

It's beginning to look a lot like Christmas..


The Result!

Makes approx. 30 biscuits depending on size of cutter.

Ingredients
85g unsalted butter
100g golden caster sugar
1 large egg
200g plain flour, sifted, plus more for rolling
1/2tsp baking powder
1/4tsp salt

Method
Preheat the oven to 180 degrees/Gas mark 4. Line 1 or 2 baking trays with baking paper.
Cream the butter and sugar together in a bowl.
Add the egg and mix well.
Gradually add the flour, salt, baking powder and mix.
Flour a work surface, roll the dough to a thickness of 5mm.
Cut out biscuits in your desired shape and place them well spaced out on your baking tray(s).
 Bake for 10-12 mins or until they turn a light golden brown.
N.B. Remember to keep a really close eye on the time, these cook really quickly and actually do continue to cook once out of the oven!
Leave to cool on a wired rack.
Decorate as desired! If you can, these plungers are a must have baking purchase!
Pin It Now!

Christmas Bake : Peanut Butter Fudge Style.


Bonsoir everyone! Are you all feeling festive my lovely candy canes!? I hope you all are, seeing as it's only 2 SLEEPS UNTIL CHRISTMAS! In fact, I think I can feel the elves getting frantic. It's in the air...
And so, with not long now until the big day, it's been pretty crazy and hectic in the Shiner household, hence my silence. :)
However, baking has been one of my main priorities over the past weeks. I've been commandeering the kitchen for hours crafting gifts to hopefully make people as excited as I am about Christmas this year!
This evening I'm going to post my past activity, so stay tuned for a couple of posts winging your way!
My first post for this evening is a Peanut Butter Fudge recipe from this years Christmas ASDA Magazine. It's a small, modest recipe that's a complete piece of cake but tastes absolutely delicious!
I stumbled across it when I needed to whip up something quick and easy for a charity fair at school, and I have to say, I thought ASDA were trying to deceive me. So many of my friends have tried and failed to make the perfect fudgey pieces, but ooooooohhhh nooo, not me! This recipe is foolproof, and when placed in a pretty jam jar with ribbon, it makes the perfect tasty gift!
Go on, give it a try. Next time, I might substitute the peanut butter for Nutella... now there's an idea. ;)

Ingredients
125g butter
500g soft brown sugar
120ml milk
250g crunchy peanut butter
1/2tsp vanilla extract
300g icing sugar

Method
Grease a 20cm x 20cm shallow cake tin and line it with baking paper.
Melt the butter in a large pan.
Add the brown sugar and milk and stir over a really low heat until the sugar dissolves - do not let it boil.
Scrape down any mixture that has splashed up onto the sides an boil for 2-3 minutes - do not stir.
Remove this from the heat and stir in the peanut butter and vanilla.
Put the icing sugar in a large bowl and pour the hot mixture on top - beat until smooth.
Spoon the mixture into a tin and leave to cool.
Cut into squares, these yummy bites can be stored in the fridge for up to a week!

Pin It Now!

Sunday, 2 December 2012

The Holidays are Coming...


Well hello there my sugary snowflakes! How are we all on this cold winters eve? Tucked up in the corner of a sofa somewhere? Sipping on a cup of tea or hot chocolate? Munching on bourbons  (I know, they're my weakness too) and even if you're not... Just take a second out of your lives to imagine it. It'll get you feeling Christmasified in no time! :D
Because it's that time of year again! Yesterday was the first of December and I have to say, even as I get older, the ritual of opening the first window in my advent calendar is always so exciting, for me, it starts a season of food, family and friends. What's not to love?
In my opinion, it's the traditions that make Christmas. Those outings and funny little habits that your family do every single year. The reasons forgotten. But the sentiment still there.
And speaking of outings, I just thought I'd share with all of you lovelies what I've been up to in order to kick-start the festive season!
For those of you who don't know Somerset particularly well, Bath is an absolutely beautiful city built on the site of original Roman Baths and all year round it really is a sight to behold. A Rome away from Rome really... (see what I did there? I know. It's not my best. Sorry about that... Oh dear. I'm coming over all embarrassed... excuse me.)
ANYWAY, every year, they hold a Christmas Market. Y'know, the whole wooden hut, fairy lights job, and every year, we miss it. I don't even know why, we live so close, we just never get round to going.
But this year was different and with a lovely cooked breakfast filling our tummies, we donned our cosiest scarves, dragged the Grandparents into the car and head off to the market.
I have to say, it was amazing!!
I hope the pictures will let you know how much.
I even treated myself to some new little baking equipment, a lovely little Christmas tree cookie cutter and a cute little plunger in the shape of a snowflake from the The Happy Cupcake Company stall, check out their site it's amazing!
Good day all round me thinks! Hope this finds everyone well and enjoying the early Christmas cheer! :D
Pin It Now!

Friday, 23 November 2012

The Drizzliest Lemon Loaf.


Happy Birthday Fabian!


Have no fear my lovely cinnamon swirls, Jess is here! Ah, ah, ah! Okay, so, I promise that I have a good excuse for being so silent recently. I know it's unacceptable. Look at me, wanting to start a blog, reaching someone in Spain, posting a recipe, being all 'blogworthy' and then just... mute. I apologise, I really do. However this latest instalment I'm sure will go down well with you all.
Yes. Indeed. Make way everyone. The Lemon Drizzle Cake recipe has arrived.
Original right? No, I didn't think so either.
I know it's generic, but I really do believe that no baking archive (blog/book/scroll/bible) is complete without this gorgeously simple bake. There's just something so fresh about the zing of lemon and sugar coinciding with a crumbly cake that makes my mouth water.
So what's caused Jess to share with us her lemony adventures? I hear you ask.
Well of course, being the storyteller and general chatterbox that I am... I will tell you.
Actually, it's not greatly exciting (I live in a village remember, not a lot goes on. In fact, getting caught up in a cow crossing is pretty much the highlight of any day) however, this particular cake was requested of me a while ago from a friend who managed to get me a ticket to Glastonbury Festival next year! I was so unbelievably happy that without thinking I exclaimed 'Fabian, oh my gosh! Thank you so much!!! I'll bake you anything you want. You name it, I'll bake it.'
I instantly realised that right there, he had the perfect opportunity to conjure up any crazy concoction in his head and I would be faced with the challenge of baking it... I felt weirdly nervous as he thought of what he fancied.
And then, with a smile spreading across his face he said 'Y'know what? Lemon Drizzle is my absolute favourite...'
Unfortunately, it all got forgotten about with the whirlwind of work/revision etc. until now.
Today was Fabian's 17th birthday and I decided not to back out on a promise. So he finally got his lemon drizzle. I think he enjoyed it. ;)
And so, my little sugar plums, my Lemon Drizzle Loaf! (Taken from The Primrose Bakery Book - These recipes are wonderful!)

Ingredients
155g self-raising flour, sifted
1tsp baking powder
155g golden caster sugar
20g cornflour
155g unsalted butter, at room temperature
3 large eggs
Grated zest and juice of 1 lemon

For the Drizzle
160g granulated sugar
juice of 2 lemons

Method
Preheat the oven to 180 degrees/gas mark 4. Grease 1 x 900g loaf tin and line with baking paper or a loaf tin liner
Sift the flour, baking powder, sugar and cornflour into the bowl or a food processor. Pulse the mixture for 4 seconds, or mix with a wooden spoon until evenly mixed.
Add the butter, eggs and lemon zest and juice. Process briefly until evenly blended, or beat with an electric hand whisk until evenly blended.
Pour the mixture into the loaf tin and level the top with a spatula.
Bake in the centre of the oven for 35-40 minutes until golden brown, or when a skewer inserted into the centre of the cake comes out clean.
Leave the loaf to cool.

The Drizzle
Stir the sugar and the lemon juice in a jug.
Prick the loaf all over with a fork, pour the drizzle over the loaf and allow it to set.

(apologies for the pictures not being so great, the artificial lighting in the common room was terrible!)

Pin It Now!

Tuesday, 13 November 2012

Carnival Fever!

Father and daughter carnival faces!
And as the cold snap of Autumn begins to arrive on a daily basis here, there's something quite magical about the evenings. I just love walking home from my school bus stop and seeing the lights of the houses burning through the dusky air, especially if it's been a cold, sunny day. Especially when it's been one of those days where there's a frost on the ground, not a cloud in the sky, you're wearing your cosiest scarf and just starting to think about doing a bit of Christmas baking. This is my favourite time of year!
Yesterday was certainly no exception and even though it poured with rain for the majority of the day, I still couldn't wait to get home, get comfy and HEAD OUT TO CARNIVAL!
Now, if you're not from the West Country, I'll explain, as to this day I am amazed to see the bemused faces of new people I meet as I try to describe what carnival is to them.
What's carnival? WHAT'S CARNIVAL?
Where I come from, it's one of the biggest community 'get-togethers' of the year. Always on a Monday evening in early November, hundreds of people (and I mean HUNDREDS) families, babies, cousins you name it, all turn out to watch tens of beautiful floats parade through the town, with millions of golden light bulbs twinkling at you in the darkness. It's truly magnificent, watching the walkers wave at you from the road, wearing elaborate handmade costumes adorned with lights and moving parts!
For the past couple of years I've taken part in it myself, as a group of us from my dance school annually parade with a choreographed piece, which is incredible! I just loved feeling like part of something and everyone volunteers, which is even better! I know it's cliché, but 'giving back to the community' is totally the phrase that sums it all up! :)
But this year, I decided to take a break. A levels are getting heavy pretty quickly and rehearsals were coming too thick and too fast. So, this year, I took a back seat and watched it with my Mum, Dad, Nana and Granfy, just like I always used to... It was the perfect family evening. Complete with a cosy scarf.

Pin It Now!

Sunday, 11 November 2012

'Lighter Than Light' Cakes - With White Chocolate Leaf Decoration.


And so, my little chocolate drops I bring you my first recipe!!
It's been an absolutely MANIC day. As well as remembrance day (haven't they had wonderful weather for the ceremony? I also really loved Queenie's poppy brooch. Note to self: Make one next year...) we've celebrated my Auntie's Birthday and also watched an INCREDIBLE firework display this evening! (I was so excited, in fact, that I completely forgot to take my camera, otherwise there would be MILLIONS of pictures posted on here to show you all!)
With the little amount of time that I had, the 'baking morning' I had scheduled was cut a little short! But I did spend time mulling over something short and sweet to bake. My conclusion? Of course, it had to be.. Fairy cakes. The speed demons of the baking world. :)
However... I wanted to give them a slight autumnal twist, (after all, I'd gotten cute little floral paper cases for them to bake in) and added these clever little white chocolate leaves for decoration which I took from a book named 'Cakes & Cake Decorating, Step by Step', I found it in a second hand bookshop and it's a godsend! They're so easy, but so effective, whoever came up with this idea is an absolute genius!
These little spongey gems are so light and fluffy, they take no time at all and go down a treat.
Happy Baking!
Makes 24

Ingredients
225g butter (softened)
225g caster sugar
4 large free-range eggs
225g self-raising flour

For The Leaves
150g white chocolate (however, you can make this cute decoration with any type of chocolate!)

Method
Preheat the over to 180 degrees. Line two bun trays with 24 paper cases.
Beat the butter and sugar together until creamy.
Beat in the eggs, one at a time, adding a tablespoon of flour with each addition and beat really well after each addition.
Fold in the rest of the flour.
Spoon the mixture into the cases (until about 3/4 full)
Bake for 20 minutes (until the tops spring back when touched, or when a skewer inserted comes out clean.) and cool them on a wire rack.
Leaves
Have a wander round your garden, find any leaves you think are the right size for the size of your cakes (mine were pretty small, so I put two on some cakes, I'd say rose leaves are the best!)
Melt the chocolate.
Using a very small paintbrush, carefully spread the melted chocolate on the underside of each leaf (be careful not to go over the side of each leaf)
Leave on a piece of baking parchment until completely set. (I usually put them in the fridge, and they usually take about 10 - 15 minutes to set, but it depends)
Once set, very gently peel the leaf from the chocolate and arrange them on each cake.
Once you are happy with your arrangement, gently sprinkle some icing sugar on top of the cakes for a prettier effect, and make up a small amount of icing with icing sugar and warm water.
Gently dab a bit of icing on the back of each leaf and place on the cake. Leave to set and stick. 

Pin It Now!

Saturday, 10 November 2012

Baking Withdrawal.

This is getting serious. I haven't concocted anything remotely creative for two days. TWO DAYS.
Somebody, call for an ambulance...
BUT HAVE NO FEAR MY LOVELY CHOCOLATE DROPS, I have a 'baking morning' scheduled for Sunday! Just to keep you all on your toes.
Pin It Now!

Thursday, 8 November 2012

My Blogging Debut.

So.. I'm ready for my close up!
I honestly, really, truthfully cannot believe that this is my first ever post on my first ever blog. I think I will savour this moment... it's pretty big... okay... and breath... take it all in.... take in the fabulousness of the blogging world... one day Jess, one day you may be famous... from this one simple post... your face could be plastered on cookery books all over the land...
SORRY, sorry. I had a bit of a daydream there. I do that a lot.
Anyway, so this is it for now. Just me saying a quick Hi, Hey, Hello, Howdy to everyone.
Of course, from the title of this archive of wonderment, (does that even make sense? I DON'T EVEN CARE, THIS IS MY FIRST BLOG.) you will have cleverly deduced that this is a blog all about the gorgeous, therapeutic, sweet-smelling, gut-busting hobby/lifestyle/obsession that is amateur baking! And if you haven't, well re-read it. You beautiful fools. :)
Now, not for one second will I be comparing myself to the greats, (although when I grow up. I kinda wanna be Mary Berry. Jus'sayin'. She does floral so well...) but hopefully, with a bit of luck and commitment I will share my passion for baking with all you lovelies, all of you wonderful people who love to eat, just like me.
I started baking about a year ago, as with all my GCSE exams I was getting so stressed and found the only way to calm myself was to make sweet treats for my friends and family.
I don't know what happens to me... just that feeling of popping something slightly squidgy and perhaps a little lop-sided into the oven thinking 'argh, this is never going to work...' and watching, silently, in awe, as it turns into something beautiful (and hopefully pretty tasty too).
In the end, my GCSE's went really well! And as I am now doing my A levels (I'm taking English Language, English Literature, French and Theatre Studies) I find myself wanting to bake more and more, perhaps just taking the time out from completing a mammoth French grammar booklet, and making a tray bake. Nothing spectacular. But something to make me smile.
AND SO, this is what I aim to do here! Post yummy looking things that wont only get your tummy rumbling, but hopefully inspire you to do the same! After all, happiness is home-made. xxx
Pin It Now!